
When it comes to selling on Amazon, efficiency is key. That’s why the “Add Products via Upload” option is a game-changer for sellers like us. It allows us to bulk upload our inventory, saving precious time and effort. In this article, I’ll walk you through the process step-by-step, making it a breeze for you to get your products listed and start selling.
As an experienced Amazon seller, we’ve used this method countless times. It’s not just about saving time; it’s about accuracy too. By using a template, we can ensure all our product information is consistent and complete. So, let’s get in and find out how to make the most of this fantastic feature!
Steps for Adding Products via Upload on Amazon Option
The beauty of the Add Products via Upload option lies in its simplicity. With just a few steps, we can get our entire inventory up on Amazon. It’s like having a superpower that lets us do hours of work in just minutes. Let’s break it down and see how it’s done.
Step 1 – Get into Amazon Seller and Go to Inventory Option
First things first, we need to get to the right place:
- Log into your Amazon Seller Central account. It’s our command center for all things selling on Amazon.
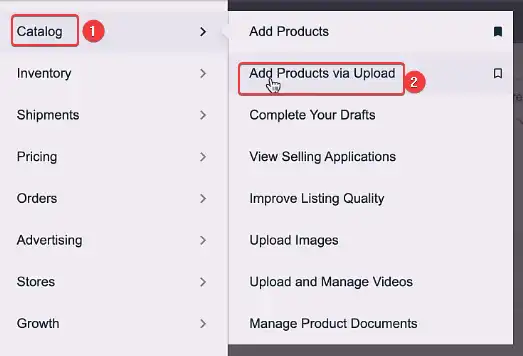
- Once you’re in, hover your cursor over the Hamburger or 3 lines at the top left of the page.
- In the dropdown menu, you’ll see the Catalog option. Expand it and you will get Add Products via Upload. Click on that, and we’re off to a great start!
Step 2 – Generate the Template for Your Products
Now, this is where the magic begins:
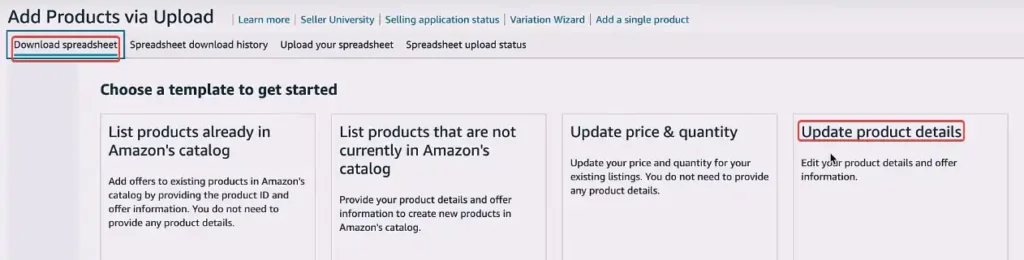
- On the Add Products via Upload page, click on the Download spreadsheet and then click on Get Product template under the Update product details section.
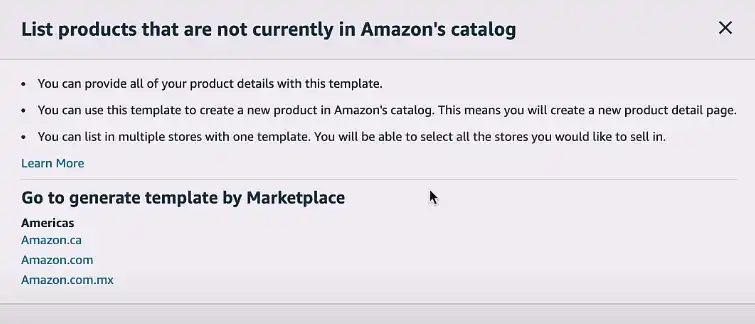
On the next window, choose the origin of your product’s details.
- Next, we need to select our product category. We have two options here:
- Use the Search tool
- Use the Amazon Product Classifier tool
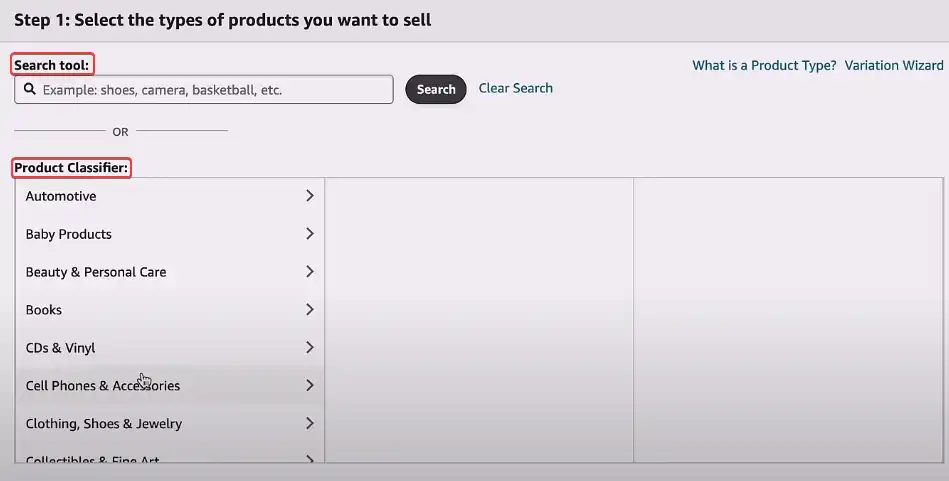
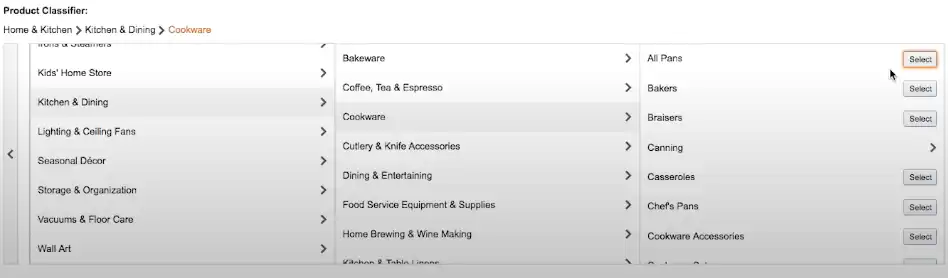
We always recommend using the Product Classifier tool. It’s more detailed and helps ensure we’re in the right category. Here’s an example:
Let’s say we’re selling a blue ceramic mug. We’d navigate to Home & Kitchen > Kitchen & Dining, then to Cookware. Under this subcategory, we can choose items like bakers, canning, pans, etc.
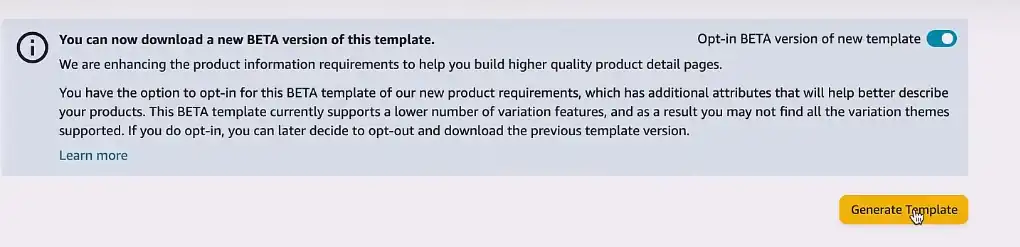
- Once we’ve nailed down our category then click on Generate Template. This is our golden ticket to efficient listing!
Step 3 – Fill Out the Template and Save It
After downloading the template, it’s time to fill in the details. This step is crucial for ensuring your products are listed correctly on Amazon. Let’s break it down section by section:
Basic Product Information
- Product Type: Select the only option available. Let’s say we are selling t-shirt, for this you will need to provide the product type as attire/apparel/fashion/t-shirt, etc.
- Seller SKU: Create a unique identifier for your product. If it’s a new item, you can generate one yourself. Make it logical and easy to remember. For example, it can be something like this GS-001-RED-XL
- Brand Name: Choose your brand name from the drop-down menu. Ensure it matches exactly with your registered brand on Amazon. If you don’t have any brand name registered on Amazon, then simply you can put NA and once you get your brand name, replace NA with your brand name.
- Product Name: This is your product title. Craft it carefully, including key details like brand, color, size, and material. Remember, a good title can significantly impact your product’s visibility. If we are selling T-shirt which color is red, they we can name it MyBrand Red Large T-Shirt.
- Product ID: Enter either the UPC (Universal Product Code) or ASIN (Amazon Standard Identification Number) if you’re relisting an existing Amazon product.
- Product ID Type: Specify whether you’re using a UPC, EAN, or ASIN. You can find valid values in the ‘Valid Values’ tab of your template.
Product Details
- Item Type Keyword: This helps categorize your product. Use the drop-down menu or refer to the ‘Valid Values’ tab for options.
- Quantity: For FBA (Fulfilled by Amazon) products, you can enter 0 or 1. Amazon will update this based on your actual inventory.
- Main Image URL: While not mandatory at this stage, having your main product image ready can be helpful. Ensure it meets Amazon’s image requirements.
- Discovery: This is where you’ll enter your bullet points. Focus on key features and benefits of your product.
- Search Terms: Add relevant keywords that shoppers might use to find your product. This improves your product’s discoverability.
Variations and Specifics
- Number of Pieces, Scent, etc.: Fill out these fields as they apply to your product. Be accurate and detailed.
- Variation Theme: If you’re listing product variations (like different colors or sizes), specify the variation theme here. For example, if your variation is color and material, you’d need to fill out both of these fields.
Dimensions and Fulfillment
Dimensions: Provide accurate measurements:
- Unit of Measure (e.g., inches, centimeters)
- Length
- Width
- Height
- Weight
- Unit of Weight (e.g., pounds, kilograms)
Fulfillment Center: For sellers in the US, enter “Amazon_NA” (North America).
Package Details: Include:
- Package Weight
- Package Height
- Package Width
- Package Length
Once we’ve filled everything out, save the file. We’re almost there!
Step 4 – Add the Products via Upload Option
The final stretch – let’s get those products listed:
- Head back to the Add Products via Upload page.
- Click on Upload Your spreadsheet.
- Click Browse files and select your saved Excel file.
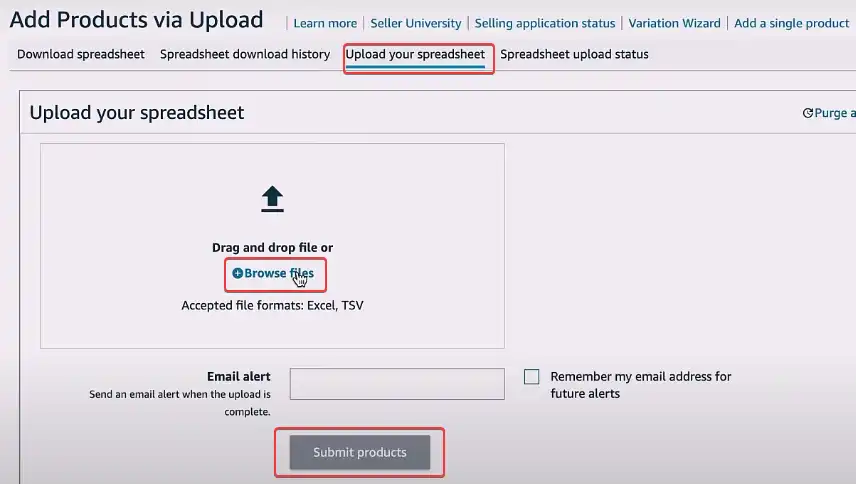
Hit Submit Products and… voila! You’ve just added your products to Amazon. See, how easy the procedure is!
Note: If your file size is greater than 5 mb then it will take around 8 hours to process the file. Lesser than 5 mb would take a couple of minutes.
People Also Ask
What should I do if I get an error message when uploading my inventory file?
First, identify what’s causing the error and based on that you will need to fix the error. Let’s say if the error states “A value is missing from one or more required columns from this group: [country_of_origin = null]” then you will need to check your file and provide the required information there. After that, save the file and upload it again. Thereafter wait to see if the issue is solved or not.
How can I track the status of my inventory file upload?
To track the status of the uploading file, get into the Add products via upload and go to the Spreadsheet Upload Status section and there you will get your required info.
Can I add multiple products in one inventory file?
Yeah, of course! As we have stated earlier, you can add bulk products! In the inventory file, you can as many products as you want!
What to Do When Your Product Doesn’t Have a UPC or AISN
If your product doesn’t have a UPC or AISN, you can purchase a barcode from GS1, a global organization that assigns unique barcodes. If you’re selling on Amazon, you might be eligible for a GTIN exemption if your product meets certain criteria. Alternatively, you could use the manufacturer’s UPC if applicable or explore other identifiers like MPN or SKU. As a last resort, you could list your product as “generic,” but this may limit its visibility.
Conclusion
Adding products via upload is a convenient and efficient way to expand your Amazon product catalog. By following these steps and paying attention to the details, you can successfully list your products and start selling on Amazon. Remember to always refer to Amazon’s seller guidelines for the most up-to-date information and best practices.